
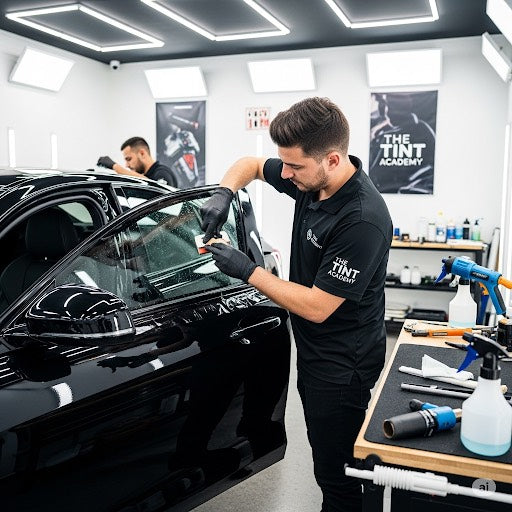
Tinting a Tesla Model 3 roll-down window is a high-reward job — the finished look is sleek, heat rejection is improved, and passenger comfort goes way up. But Tesla glass and frameless doors can make these windows more challenging than a standard framed side window. Below is a clear, professional workflow from The Tint Academy that walks you through everything you need to do for a proper installation.
Before you start — what you’ll need
Tools & supplies:
-
Quality automotive window film (matched to customer spec)
-
Slip solution (distilled water + baby shampoo or commercial slip)
-
Tack solution (distilled water + a few drops of isopropyl alcohol)
-
Sharp squeegees (felt and hard), hard card
-
Heat gun (variable temperature) + small heat roller (optional)
-
Sharp plotter or razor blades and straightedge for trimming
-
Lint-free microfiber towels
-
Isopropyl alcohol (70–90%) and glass cleaner (ammonia-free)
-
Masking tape, suction cup glass holders, and a window harness or prop
-
Gloves (nitrile) and headlamp for close inspection
-
Protective covers for interior trim and electrical connectors
Prep time: ~30–45 minutes. Installation: 30–90 minutes per window depending on experience.
Step 1 — Confirm fit & film selection
-
Verify which window(s) are roll-down and whether the customer has frameless doors (Model 3 commonly has frameless rear and sometimes front).
-
Choose film with appropriate adhesive type and edge adhesion for a frameless application (if in doubt, pick a ceramic or premium dyed/ceramic product that’s stable with heat).
-
Check local laws for visible light transmission (VLT) limits and inform the customer.
Step 2 — Clean and protect the workspace
-
Park the car in a dust-free, shaded, ventilated space. Avoid direct sunlight.
-
Remove or protect door sill, seat, and interior trim with drop cloths. Disconnect small trim clips only if you know how — if not, leave panels in place and protect them.
-
Use a dust blower or tack cloth to remove loose dust around the door and window channel.
Step 3 — Prepare the glass
-
Lower the window slightly (enough to access top edge but not so it retracts into the door where you can’t control it). For a roll-down install the glass must be stable — use a suction cup or have an assistant hold position if needed.
-
Clean the glass thoroughly: glass cleaner + lint-free towel, then wipe with isopropyl alcohol to remove oils. Repeat until the surface is perfectly clean.
-
Inspect for chips, resin, or adhesive residue and remove carefully.
Step 4 — Measure, template, and cut
There are two main methods: pre-cut (plotter) or wet cut in-vehicle. We recommend a pre-cut from a plotter for Model 3 roll-down windows when possible — it reduces trimming inside the door channel.
-
If using a plotter: measure carefully, include about 3–5 mm extra on all edges for tucking into the channel. Export accurate templates.
-
If cutting by hand: apply film to the outside of the glass (with slip) and mark trim lines; cut oversized and trim later. Always leave extra to tuck into the channel.
Step 5 — Wet install and positioning
-
Spray the glass liberally with slip solution. Also spray the adhesive side of the film (if using pre-cut, adhesive-down on a clean surface).
-
Lift the film into position and align top edge first. Use a suction cup and smooth from the center out using a felt squeegee to remove large pockets of slip solution.
-
Keep the window slightly down while you work the interior edges — this prevents the glass from sliding unexpectedly into the door.
Step 6 — Tack, squeeze, and tuck the edges
-
Use the felt squeegee vertically first to force water out, then horizontally. Work from the center to the edges in overlapping strokes.
-
Trim excess film carefully with a hooked blade or razor held at a very shallow angle — minimal pressure to avoid nicking the glass.
-
Tuck film into the top and bottom channels using a hard card and a small trim tool. For frameless doors, be conservative when tucking — too much film in the channel can bind the window or cause peeling later. Use tack solution near the edges if needed to reduce water and help final adhesion.
Step 7 — Heat shaping and finishing
-
Use a heat gun on low to medium heat to gently conform the film around any curvature. Keep the gun moving and never exceed temperatures that make the adhesive bubble.
-
Work from the center out; use a small roller or the hard card to press the film firmly into place as you heat. This speeds polymer settling and reduces edge lift.
-
Re-inspect the edges for trapped moisture or bubbles. Small pinholes can be opened and pressed down; larger areas must be re-squeegeed and reheated.
Step 8 — Cure & test
-
Let the film cure in a dust-free area for at least 24–48 hours (adhesion continues over 2–4 weeks). Advise the customer not to roll the window up/down frequently for the first 48 hours.
-
After about 1 hour (while still workable), carefully raise and lower the window slowly a couple of times to check for any rubbing, catching, or binding. If the window binds, lower it and re-inspect the channel and edge tuck — correct immediately.
-
Recheck for edge lifts after 48 hours and re-heat to re-seal if necessary.
Common problems and how to avoid them
-
Window binding / catching — usually caused by excessive film tucked into the channel. Solution: remove excess and re-trim.
-
Edge lifting — insufficient tack or poor edge sealing. Use a tack solution and heat to set the adhesive near edges.
-
Bubbles that don’t pop — often caused by contamination (wax, silicone) on the glass or film. Clean again and re-install if needed.
-
Film creasing at the top corner — occurs on frameless designs if film is too small or not relieved with heat. Leave extra material and heat-shrink carefully.
Safety, warranty & legal notes
-
Always check and follow local laws for window tint darkness and reflectivity.
-
Frameless Tesla doors are more sensitive — improper installs can cause window motor strain or trim damage. If you’re unsure, recommend a full door panel removal or a hands-on training session.
-
Use manufacturer-recommended films for best warranty coverage; improper installs can void film warranties.
Final tips from The Tint Academy
-
Take your time. Small mistakes on a Tesla window are costly.
-
If you’re new to frameless windows, practice on donor glass first or take a hands-on course.
-
Invest in a good plotter or accurate templates; repeatability makes the job faster and cleaner.
-
Communicate clearly with the customer about curing time and care instructions (no automated car washes, avoid rapid window use for 48 hours).
Share and get 15% off!
Simply share this product on one of the following social networks and you will unlock 15% off!