


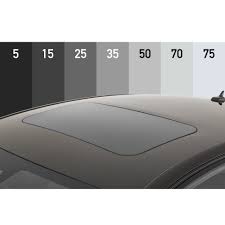
Tinting a sunroof is a great way to reduce glare, heat, and UV exposure inside your vehicle—especially during those sunny days. However, tinting a sunroof isn't the same as tinting side or rear windows. There are unique challenges and precautions you need to take to ensure a successful and safe installation.
In this blog, we’ll break down the proper steps to tint a sunroof, what tools you'll need, and the key things to watch out for.
✅ Why Tint a Sunroof?
-
Heat Reduction: Sunroofs let in a lot of direct sunlight, heating up your cabin fast.
-
UV Protection: Even factory glass doesn’t block all UV rays. Tint film helps protect your skin and interior materials.
-
Glare Control: Tinting reduces eye strain and makes driving more comfortable.
-
Privacy & Style: Adds a sleek look while increasing privacy.
🛠️ Tools & Materials You'll Need:
-
High-quality heat-shrinkable window tint film
-
Heat gun
-
Squeegee
-
Spray bottle with slip solution (baby shampoo + water)
-
Razor blade or precision knife
-
Hard card or felt squeegee
-
Glass cleaner
-
Lint-free cloths
-
Safety glasses & gloves (optional, but recommended)
🧼 Step-by-Step: How to Tint a Sunroof
Step 1: Clean the Glass Thoroughly
Sunroofs tend to collect dirt, pollen, and grease from the outside and inside. Clean both sides of the glass using a quality glass cleaner and a lint-free cloth. Make sure there’s no dust, debris, or streaks left behind.
Pro Tip: Use a clay bar for a deeper clean if the glass feels rough.
Step 2: Prepare and Cut the Film
Pre-cut the film slightly larger than the sunroof. Lay it on the outside of the glass (if flat enough) to shape it. Sunroofs often have a slight curve, so you'll need to heat-shrink the film just like you would on a rear window.
Step 3: Heat Shrink the Film
Spray the outside of the glass with a little soapy water. Lay the film liner side up and use a heat gun to shrink it to the curvature of the glass. Use the “fingers and anchor” technique to avoid creases and ensure a proper fit.
Watch Out: Overheating the film can cause it to warp or bubble. Keep the heat gun moving and don’t stay in one spot too long.
Step 4: Wet Apply the Film to the Inside
Peel the liner, spray your slip solution on the adhesive side, and also spray the inside of the sunroof glass. Carefully place the film inside and begin smoothing it out using your squeegee.
Start from the center and work outward to remove all air and water.
Pro Tip: Use a felt-wrapped squeegee to avoid scratching the film.
Step 5: Final Touches & Inspection
Use a hard card to press out any remaining edges or bubbles. Check all corners and edges to make sure the film is sealed properly.
Let the film cure for at least 24–48 hours before opening the sunroof or cleaning it.
⚠️ Things to Watch Out For:
-
Curved Glass: Sunroofs often have complex curves that require precise heat shrinking.
-
Moisture Traps: Be cautious around seals and tracks—too much slip solution can get into the headliner.
-
Metallic Tints: Avoid films with high metal content, as they can interfere with GPS, satellite radio, and sunroof sensors.
-
Panoramic Roofs: These larger roofs may have multiple panels—each should be tinted separately, and with extra care.
Final Thoughts:
Tinting a sunroof is a valuable upgrade, but it requires the right tools, technique, and patience. If you're not experienced or comfortable doing it yourself, consider having it professionally installed. But if you're learning and practicing, the sunroof is a great project to test your heat-shrinking and installation skills.
Want to learn more techniques like this?
Join us at The Tint Academy for hands-on training and certification!

Share and get 15% off!
Simply share this product on one of the following social networks and you will unlock 15% off!