


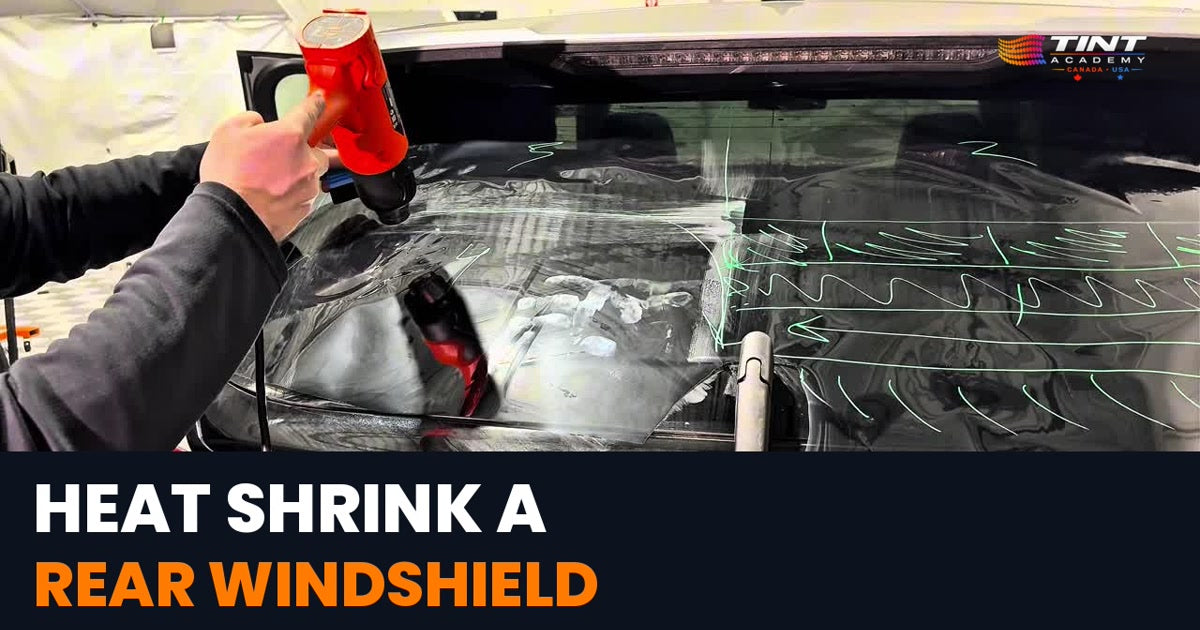
Struggling to shrink a rear windshield? In most cases it isn't your heat gun, it's your setup. In this Tint Academy tutorial we walk through the full back-window heat-shrink method we teach in class: set the film, build the H pattern, split the glass into four quadrants, then shrink each quadrant in small sections with short bursts of heat and pressure.
Watch: How to Heat Shrink Rear Windshield Tint
Watch the full video on YouTube
Step 1: Set the Film First
The number one issue installers run into is the setup. If you don't set the film up properly from the beginning, it's going to give you a much harder time to shrink. Start by spreading the film evenly across the glass.
Step 2: Reinforce the Horizontal Line
Once the film is spread, you'll see a straight line running across the window. Reinforce that line. This splits the glass into a top half and a bottom half and sets you up for the next step.
Step 3: Build the H Pattern
Fingers that come in from the sides can't be shrunk where they are. So instead:
- Pull the fingers down on one side to create a block.
- Pull them up on the other to create a block.
- Do the same on the opposite side of the window.
Now you've built your H.
Step 4: Create Four Quadrants
Last step of the setup: push down and push up through the center to put a block in the middle. That gives you four quadrants. All the excess film that was running sideways now runs vertical, and each quadrant behaves like its own small side window. If you can do a side window easily, this method makes the back window just as manageable.
Step 5: Shrink One Quadrant at a Time
Focus on one quadrant only. Get that entire quadrant completely flat, then move on to the next. Don't just try to tack all the fingers out at once, and don't try to push all your excess material across the whole window.
Heat in Small 1–2 Inch Sections
Work in 1–2 inch segments and only heat the section you're working on. Get it flat, move to the next section, and keep going, always working from the outside in.
Heat, Press, Repeat
Give the section 3–5 seconds of heat, press it down, then repeat: 3–5 seconds of heat, press down. When you reach the edge, come back over and start the next row. In the video we show this on quadrant number four until it's completely flat, then move on to quadrants three and two following the exact same pattern.
Step 6: Exact Cut, Then Wet Re-Shrink Before Install
Once every quadrant is flat, do your exact cut. Then wet the film and re-shrink it one more time with a wet shrink before you go to install.
The Two Biggest Rear Windshield Shrinking Mistakes
- Not setting up your dry shrink properly. A bad setup makes everything after it harder.
- Not building out your four quadrants. Build the four quadrants, then work small sections inside each one, and you'll get it down every single time.
How to Register for a Course
Want to learn this hands-on with an instructor beside you? Tint Academy runs 2-day hands-on window tint and PPF certification courses across Canada and the USA, using Scorpion film. We've trained 6,500+ students over 10 years.
Upcoming Window Tint Courses
- Dallas, TX: Solar Spectrum Window Tinting, 1103 Keller Pkwy Suite 302, Keller, TX 76248. Nov 14–15, 2026
- Halifax, NS: RAD Detail, 1109 St Margarets Bay Road, Unit 1, Beechville, NS. Nov 14–15, 2026
- Phoenix / Mesa, AZ: The Bays – Mesa, 2450 W Broadway Rd #113, Mesa, AZ 85202. Nov 14–15, 2026
- Indianapolis, IN: Scorpion Films, 6184 S US Hwy 231, Cloverdale, IN 46120. Nov 14–15, 2026
- North Charleston, SC: iDetail of Charleston, 5700 Dorchester Rd C5, North Charleston, SC 29418. Nov 14–15, 2026
- Calgary, AB: C3 Auto, 4905 30 St SE #1101, Calgary, AB. Nov 21–22, 2026
- Niagara Falls, ON: Tint Academy HQ, 6893 Oakwood Drive, Niagara Falls. Nov 21–22, 2026
- Winnipeg, MB: Slick Tint, 231 Oak Point Hwy, Winnipeg, MB. Nov 28–29, 2026
- Montreal, QC: Place Nobel, 1999 Rue Nobel, Sainte-Julie, QC. Nov 28–29, 2026
Three Ways to Register
- Online: pick your city and dates and register at tint.academy.
- USA: call or text 321-364-9518.
- Canada: call or text 289-201-2070.
Don't see your city? More dates are posted at tint.academy.
FAQ: Heat Shrinking a Rear Windshield
What is the H pattern in window tinting?
Fingers coming in from the sides of a back window can't be shrunk where they are. You pull them down on one side and up on the other to create blocks, then do the same on the opposite side. The resulting shape is an H.
Why split the rear windshield into four quadrants?
Pushing down and up through the center turns the H into four quadrants and makes the excess film run vertical. Each quadrant then shrinks like a small side window.
How long should I heat each section?
Heat a 1–2 inch section for 3–5 seconds, press it down, and repeat, working from the outside.
Do I shrink the whole window at once?
No. Work one quadrant at a time and get it completely flat before moving to the next.
What do I do after the dry shrink?
Do your exact cut, then wet the film and re-shrink it one more time before install.
Where can I learn this hands-on?
At a Tint Academy 2-day certification course. Register at tint.academy or call or text 321-364-9518 (USA) or 289-201-2070 (Canada).
Ready to Master the Back Window?
Save this guide for your next rear windshield, then come learn it on real vehicles. Register for a Tint Academy course, and subscribe to Tint Academy on YouTube for more window tint and PPF tutorials.

Share and get 15% off!
Simply share this product on one of the following social networks and you will unlock 15% off!