


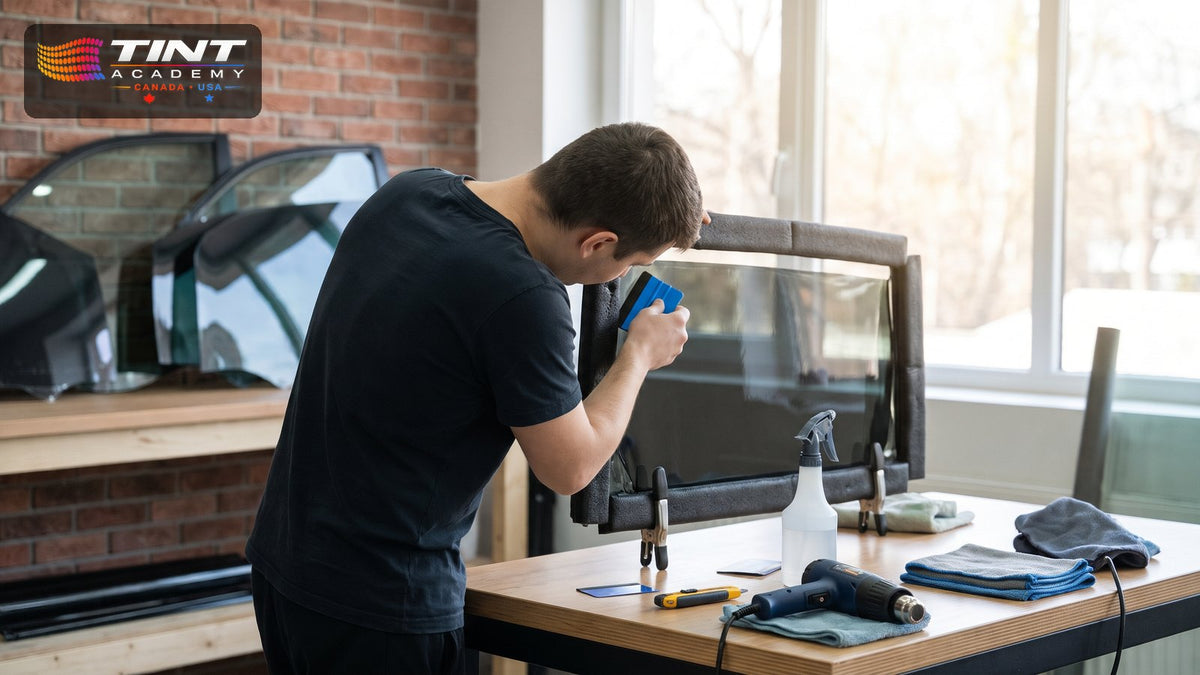
The best way to practice window tinting is on loose automotive glass, one skill at a time: clean the glass, handle and cut film without creasing it, squeegee in a consistent pattern, trim clean edges and heat shrink curved glass, then repeat the whole sequence on full windows before you touch a customer's car. Short, focused drills build muscle memory much faster than tinting whole cars and hoping it works out.
See Upcoming Window Tint Courses
Tint Academy has trained 6,500+ students over 10 years, and the same pattern shows up again and again: people who practice the basics in a deliberate order get clean results sooner. Film manufacturers say the same thing. Gila's installation instructions, for example, tell first-timers to use smaller pieces of extra film to practice before installing. Below are seven beginner drills, in the order we recommend.
What You Need for a Window Tint Practice Station
You do not need a full shop to start practicing. You need:
- Glass: loose automotive door glass, a spare window pane or a donor vehicle. Some installers ask auto glass shops or salvage yards for glass that has been removed from vehicles. Flat side glass comes first; a curved rear window comes later.
- A stand: keep the glass upright on a padded stand or against a padded surface so you work the way you would on a car.
- Film: an inexpensive roll for repetition, plus some of the professional film you plan to install.
- Tools: spray bottle, scraper, squeegee, hard card, snap-off knife, heat gun and lint-free microfiber towels. Our guide to essential window tint tools for beginners explains what each one does.
- A clean space: out of direct sun, with fans off and as little dust as possible.
7 Window Tint Practice Drills for Beginners
Drill 1: Mix your slip solution and clean the glass
Every clean install starts with clean glass and the right slip solution. Mix a light baby shampoo solution in clean or distilled water, then scrape, spray and squeegee the glass until it is spotless, edges included. Practice this until it is automatic, because most bubbles and specks start here. Our post on how to stop contamination under window film covers the common causes.
In this video from our YouTube channel, Tint Academy shows what happens when you use too much or too little baby shampoo in your slip solution: too much and the film slides around and is hard to squeegee, too little and it grabs the glass too quickly.
For the full explanation, read how much baby shampoo to use for window tinting.
Drill 2: Handle and cut film without creasing it
Window film behaves a bit like foil: once it is creased, the crease stays. Practice pulling film off the roll, rough-cutting a piece a little larger than the glass and carrying it to the window without folding or buckling it. Do this until you can move a large piece without thinking about it.
Drill 3: Squeegee in a consistent pattern
Spray the glass and the film, lay the film down and make a light anchor stroke near the top so it stops moving. Then push the water out from the center towards the edges with overlapping strokes and even pressure. Repeat the same pattern every time. The goal of this drill is consistency, not speed.
Practice trick: some installers leave the liner on and wet it so a practice piece clings to the glass for a short time. That lets you repeat positioning and squeegee reps with the same piece of film before you move on to real installs.
Drill 4: Trim clean, even edges
Uneven gaps are one of the first things customers notice. Use a fresh blade, light and steady pressure, and follow the edge of the glass to leave an even gap all the way round. A dull blade drags and can tear film, so snap off a new section often. Trim the same edge again and again until your gap looks the same from corner to corner.
Drill 5: Heat shrink on curved glass
Once flat glass feels comfortable, move to a curved rear window. Heat shrinking is the skill most beginners find hardest, so give it the most reps. Heat small areas, press each one down, and keep the heat gun moving.
In this Short from our channel, Tint Academy shows a rear windshield heat-shrink step: stop chasing every finger at once and work in small sections instead.
Then work through our full guide to the H pattern and four-quadrant heat shrinking method and the heat shrinking mistakes beginners make.
Drill 6: Put the whole sequence together
Now combine every drill on one window: clean, cut, lay, squeegee, trim and finish the edges. Do the same window several times in a row. Doing the full routine teaches you the order of operations and shows you which step still slows you down.
Drill 7: Inspect your work, then move up
After each window, check it under strong light from inside and outside. Look for dirt, hair, bubbles, fingers, creases and uneven gaps, and write down what went wrong. Fix one problem at a time on the next rep. When loose glass looks consistently clean, tint your own car, then a friend's car, and follow our step-by-step guide to how to tint a back window.
Practice Alone vs Practice With an Instructor
You can build real skill with these drills on your own, but it takes longer when nobody is watching your hands. Small habits, like squeegee angle, blade pressure or where you aim the heat gun, are hard to see in your own work. Our guide to how long it takes to learn window tinting explains why practice after training matters so much.
Tint Academy's 2-day window tint course is built around this kind of practice. It runs 9:00 AM to 5:00 PM each day in small, in-person classes. Day 1 covers tools and film, vehicle and glass preparation, installation drills, roll-down, quarter and frameless windows, tint removal and sun strips. Day 2 adds more hands-on practice, heat shrinking, rear windows and complete vehicles. Instructors demonstrate each technique, spot mistakes and help you improve. No previous experience is required, and you take home a professional tool kit and a 100 ft roll of ceramic window film so you can keep practicing afterwards. You also get Tint Academy certification, the online course, lifetime mentor support and future re-attendance at eligible classes for extra practice. See the full 2-day window tint course curriculum, and learn what the certificate means on our window tint certification page.
See Upcoming Window Tint Courses
Call or text: 321-364-9518 (USA)
Call or text: 289-201-2070 (Canada)
Frequently Asked Questions
What is the best way to practice window tinting at home?
Use loose automotive door glass or a spare pane stood upright, a light slip solution, an inexpensive roll of practice film and basic tools. Repeat one skill at a time: cleaning, film handling, squeegee pattern, trimming and heat shrinking, then combine them on whole windows.
What can I practice window tinting on?
Loose door glass, a spare window pane or a donor vehicle work best because they behave like real automotive glass. Some installers ask auto glass shops or salvage yards for glass that has been removed from vehicles. Your own car is a good next step once you are comfortable on loose glass.
Do I need expensive film to practice?
Not for every drill. Inexpensive film is fine for repeating cleaning, cutting and squeegee reps. Before you work on customer cars, practice with the professional film you plan to install, because different films can handle heat and slip differently.
How much baby shampoo should I use in my practice slip solution?
Too much soap lets the film slide around and makes it harder to squeegee; too little makes the film grab the glass too fast. Our video on baby shampoo for window tinting shows both problems and how installers adjust the mix for conditions.
Can I learn window tinting just by practicing on my own?
You can build a lot of skill on your own, but it is slow without someone to spot mistakes. A hands-on course shows you correct technique on real vehicles, then your practice reinforces good habits instead of bad ones.
When am I ready to tint a customer's car?
When you can repeatedly finish full windows, including a curved rear window, without contamination, creases or uneven edges, and you have tinted your own car or a friend's car cleanly. Speed comes later; clean results come first.
Ready to practice with an instructor beside you? Browse the upcoming window tint training and certification courses in Canada and the USA.

Share and get 15% off!
Simply share this product on one of the following social networks and you will unlock 15% off!